How to Install Decky Plugin Wine Cellar for Proton Version Management
How to Install Wine Cellar & Different Proton Versions
This guide will assume that you have the Junk -Store installed via Decky Loader. If you don’t please refer to the following guide on how to install Junk-Store.
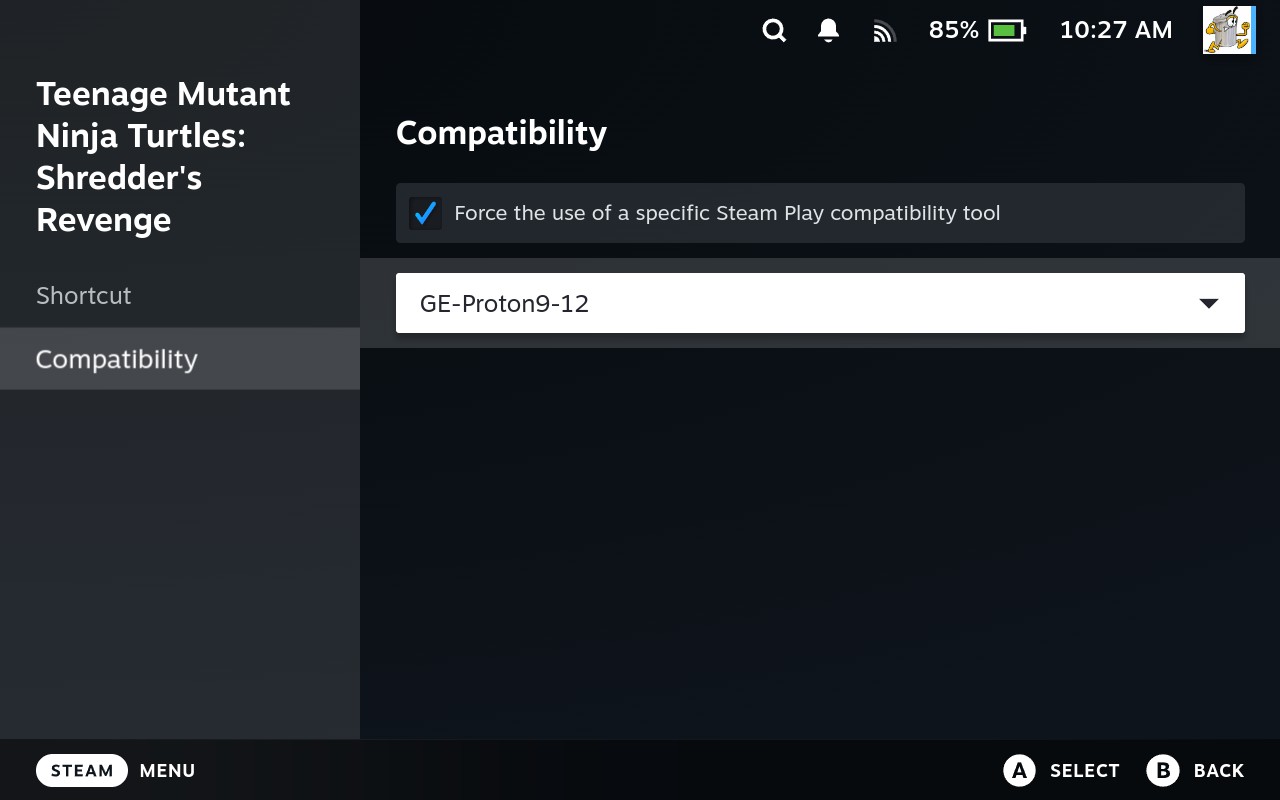
If you are unsure of how to check or change the Proton version you are using per game please refer to the following guide.
Wine Cellar is what we use for downloading different versions of Proton easily. There are other methods such as ProtonupQT. We use Wine Cellar as you don’t need to go into desktop mode to download different versions of Proton. For us it’s just an easier method to use on the Steam Deck.
If you install a game and get a black screen and it closes back to the game page, you most likely need to change your Proton version. We have a lot of luck with GEProton9-7 (we set this as our default for Junk-Store in the developer menu in Steam) and GEProton9-1 when the default doesn’t work. If you get stuck the best place to check for work arounds or Proton versions is ProtonDB.com. Alternatively if it is a game we have tested it will be in our wiki on these pages:
Installing Wine Cellar
To install the Wine Cellar plugin please follow the steps below. You can change this setting per game, as not all games work with the same version of Proton. These setting will be saved per game, it won’t change back or change to something else when you exit or reboot.
Step 1
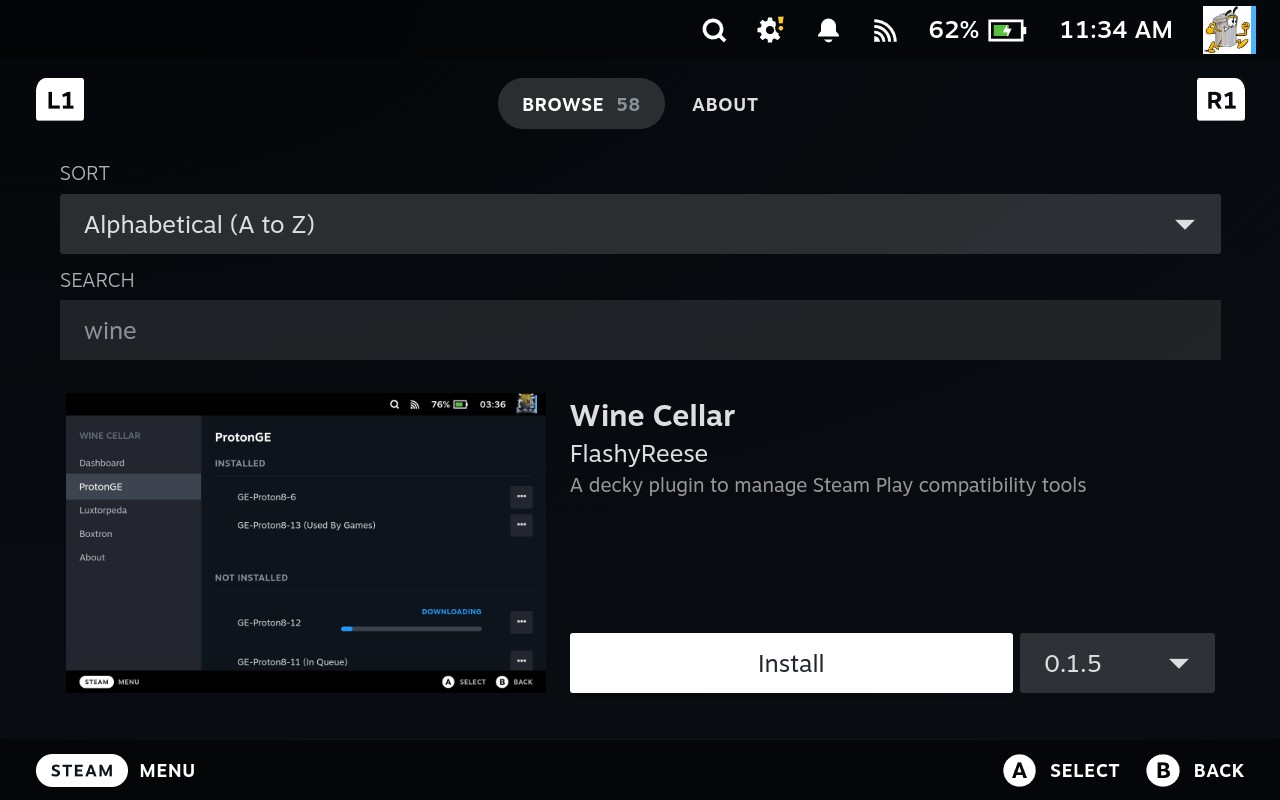
Just as you installed Junk-Store via Decky you also need to install Wine Cellar. You can search for it using the search bar in the Decky Main Store. Click on Install on the Wine Cellar Decky Plugin screen.
Step 2
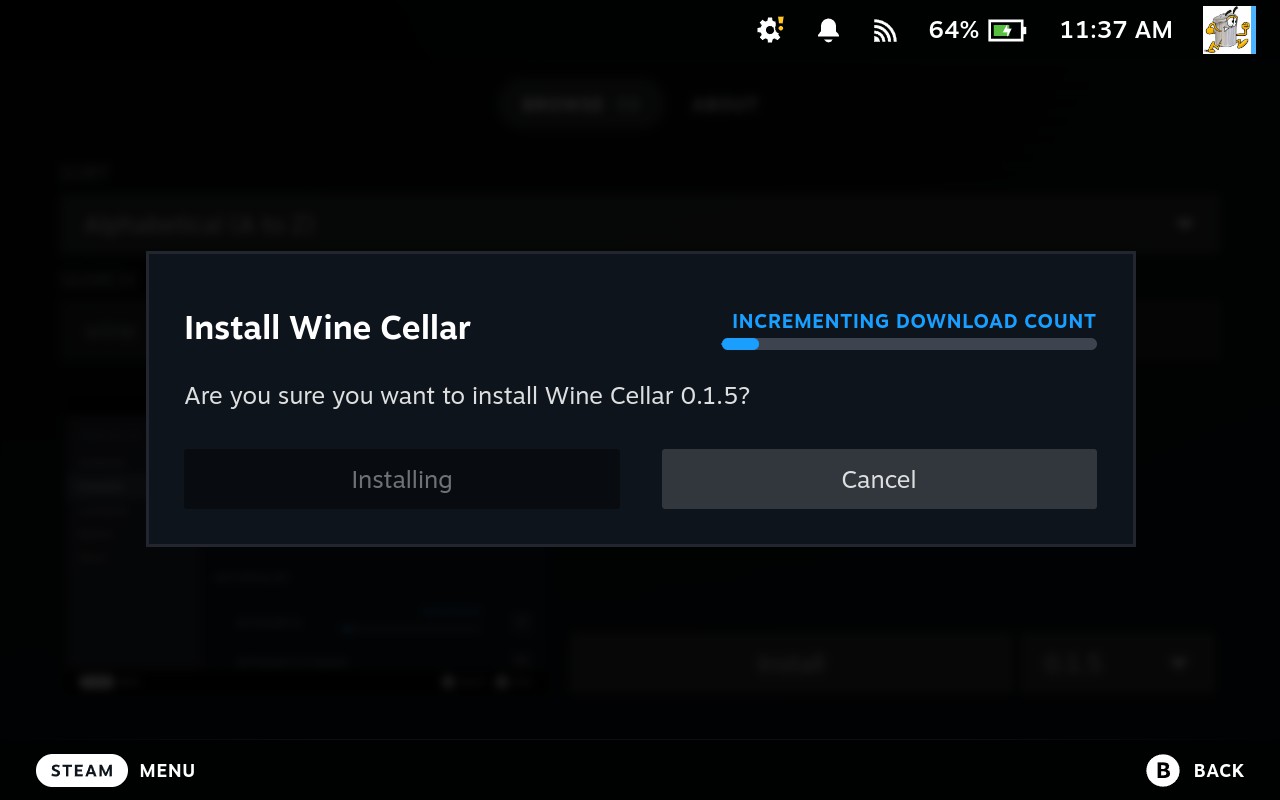
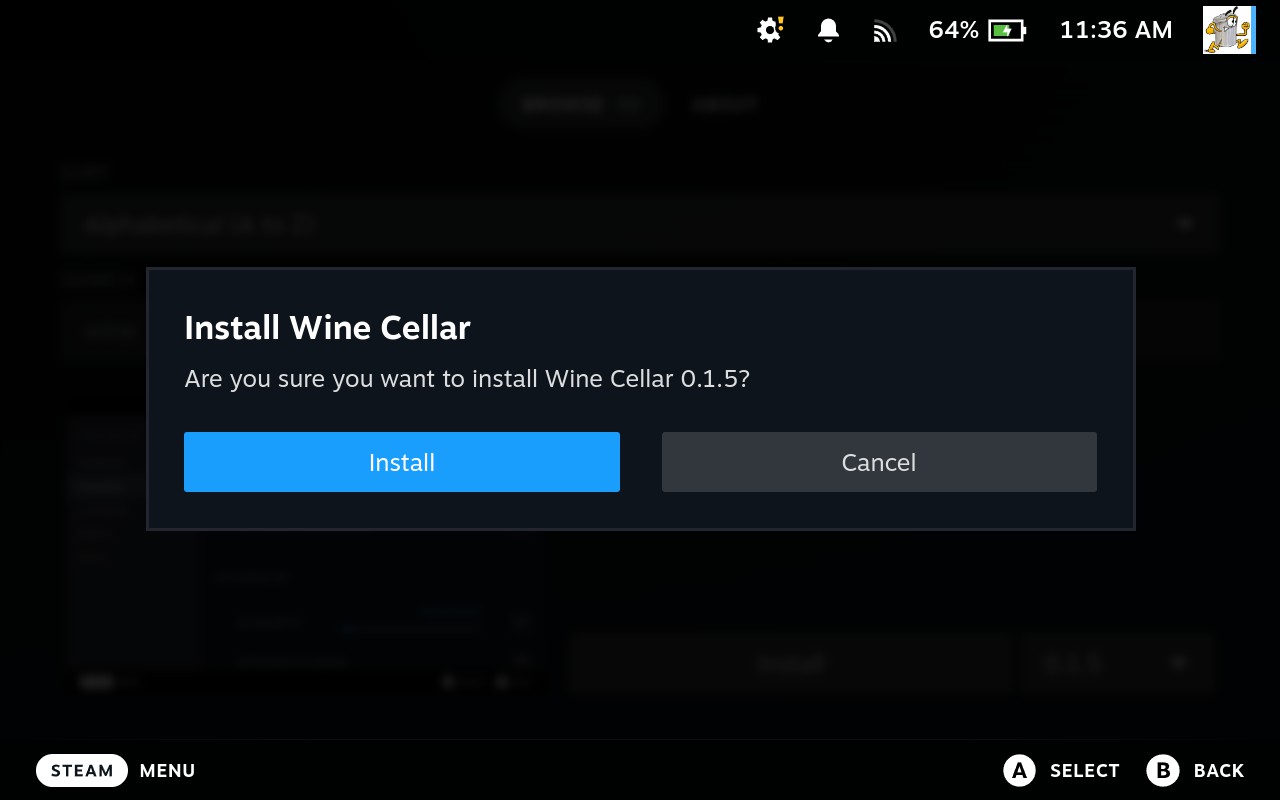
It will now ask you for confirmation to install Wine Cellar. Push A to select. It will then begin to install the plugin.
Step 3
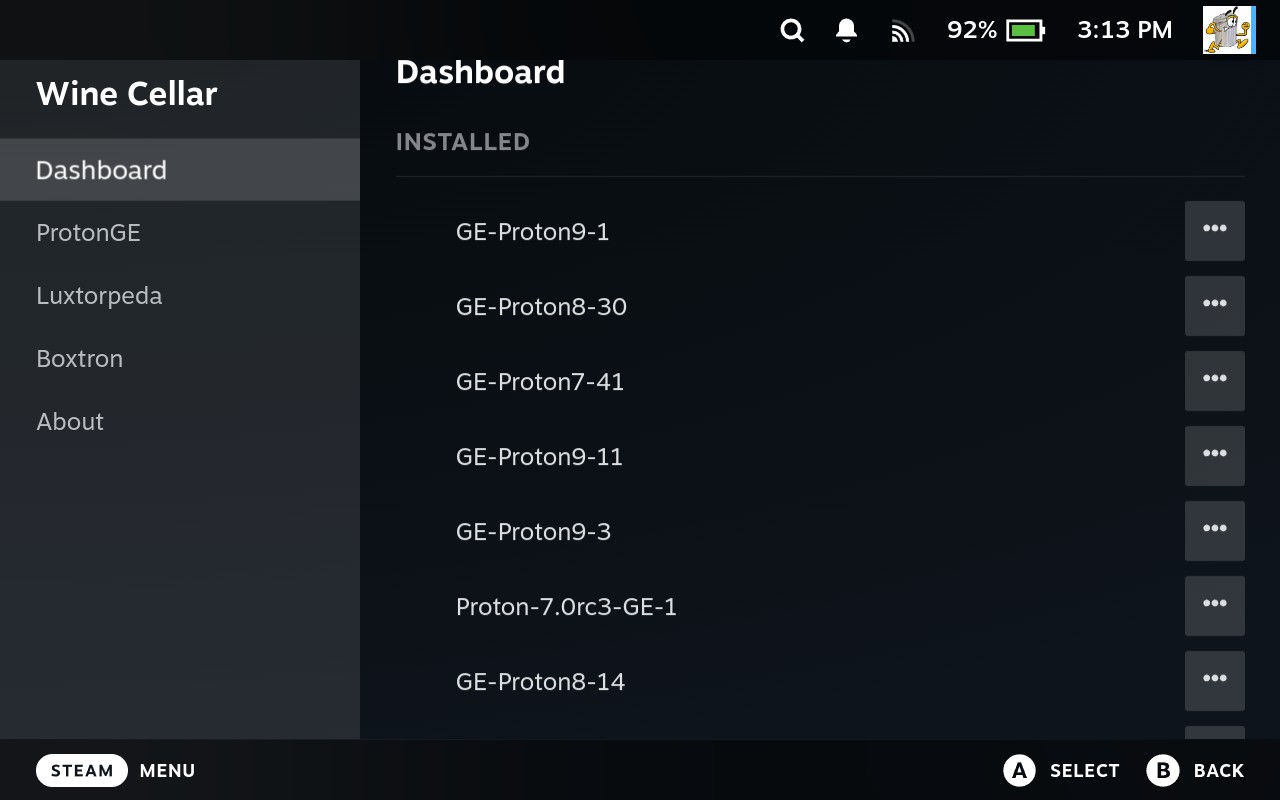
Once it has installed you can see which versions of Proton you have already installed (even if you have used a different method previously).
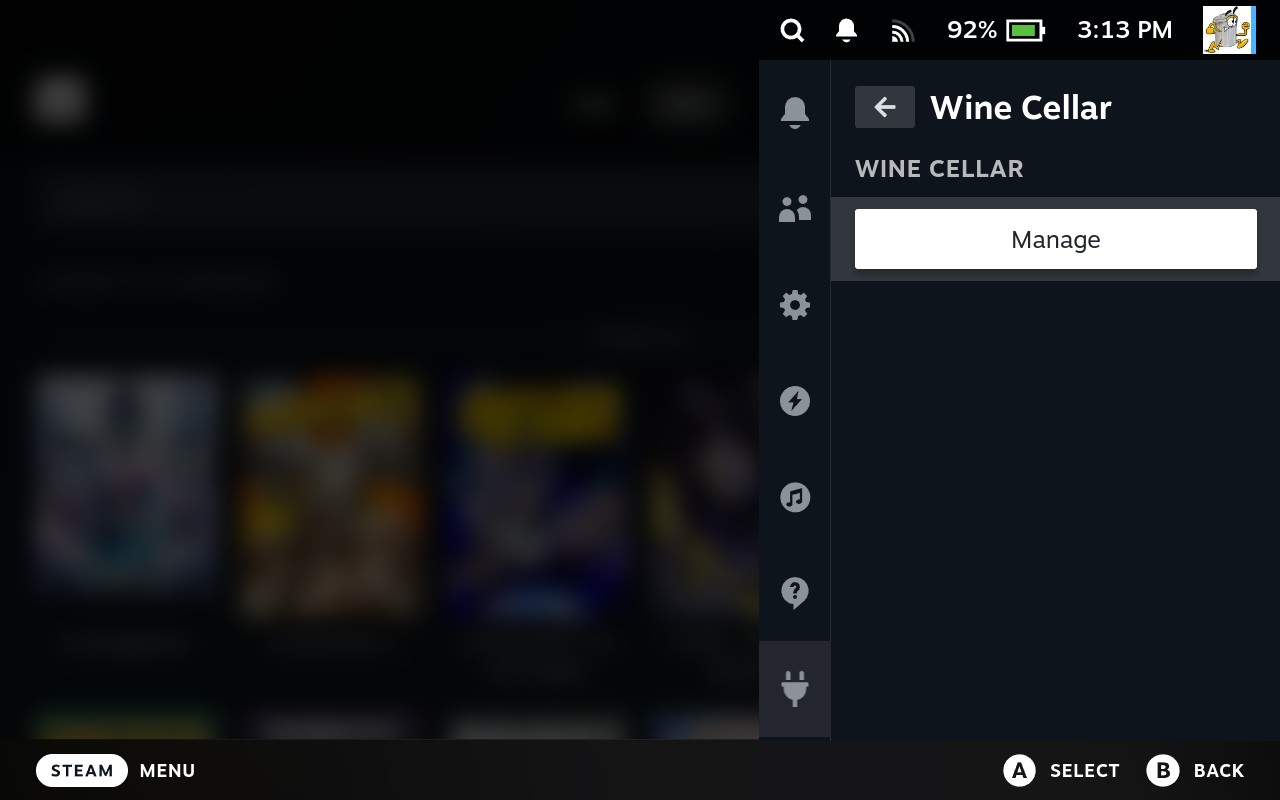
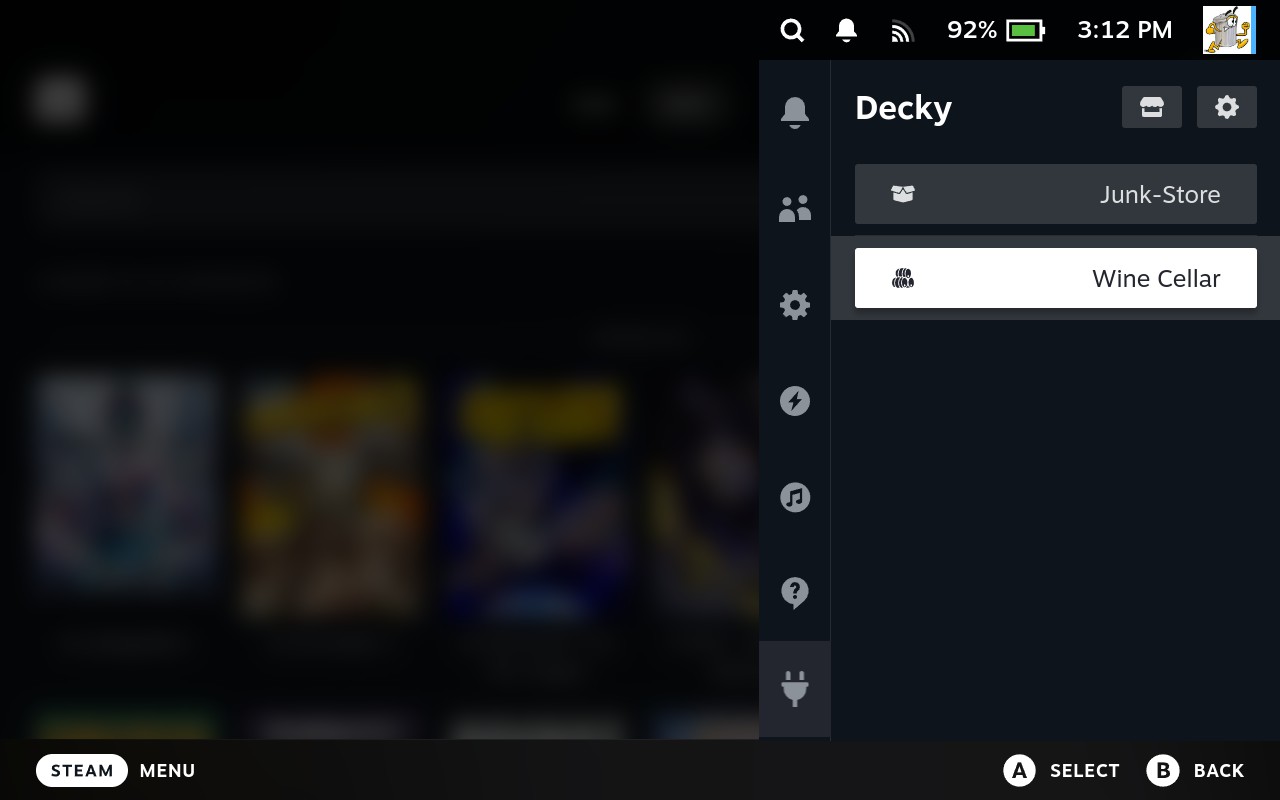
To see already installed Proton versions you need to push the QAM button (three dots) and select the Wine Cellar plugin. Push A to select. Then Push A to select ‘‘Manage’’.
Step 4
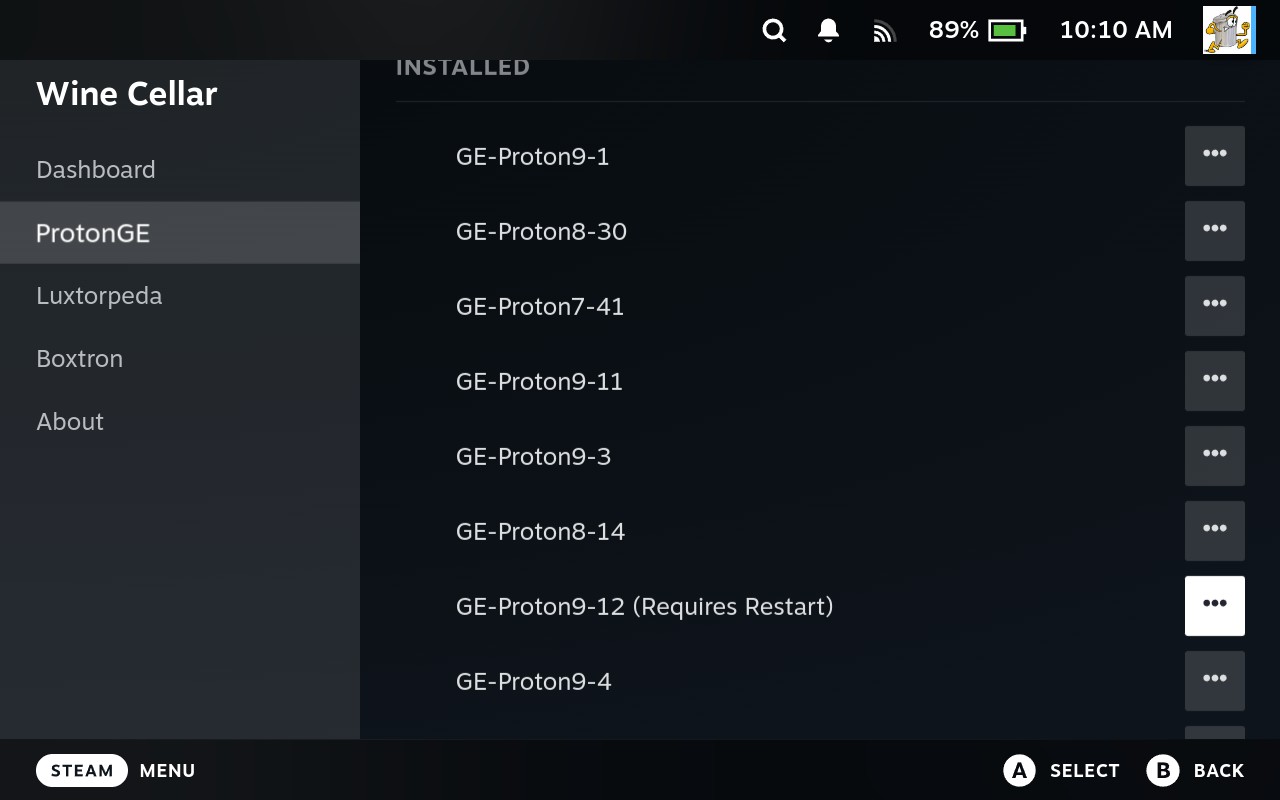
You will now see the Wine Cellar Dashboard where you can see all currently installed versions of Proton. This is where you manage your Proton versions; you can uninstall or install new versions here.
How to Install New Proton Versions
We test with ProtonGE versions of Proton because more games just work with this Proton version. It also fixes a lot of issues that Valve cannot due to licensing. Feel free to use what you prefer, we just prefer GEProton over others.
Step 5
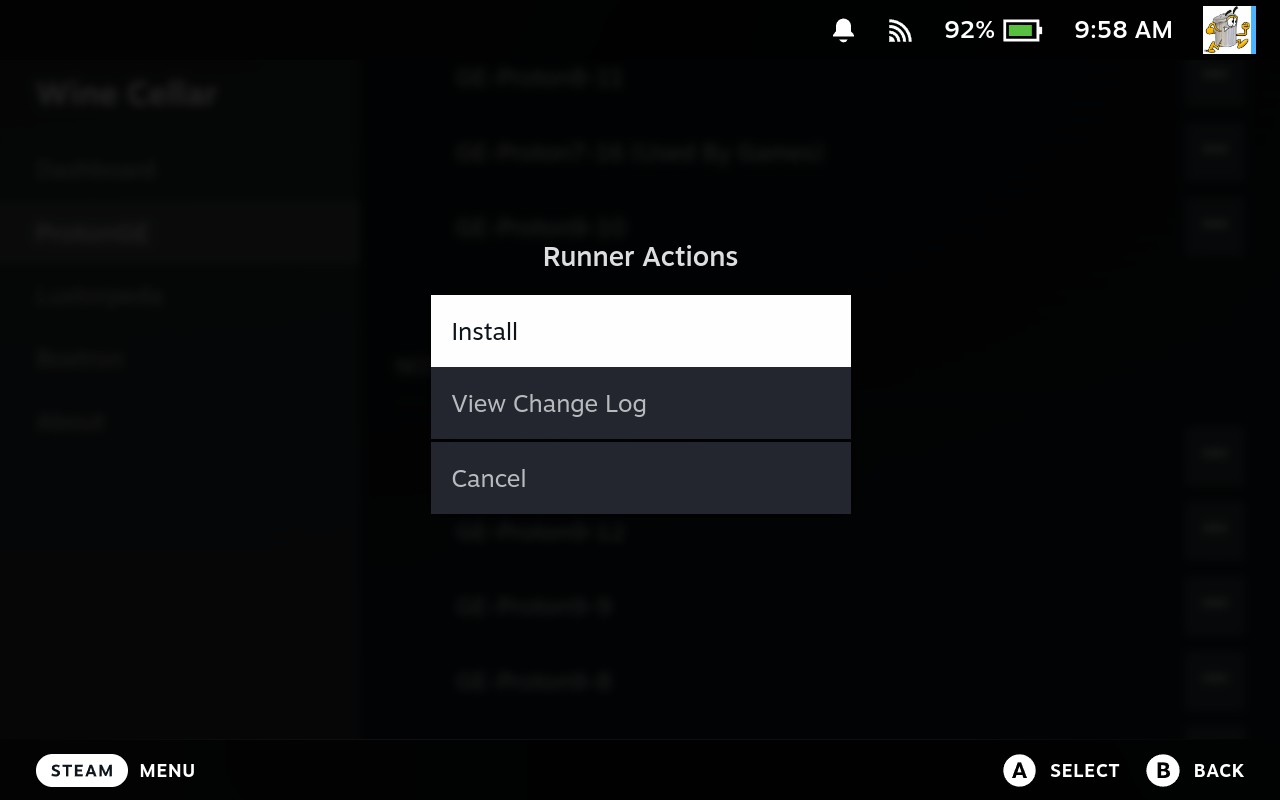
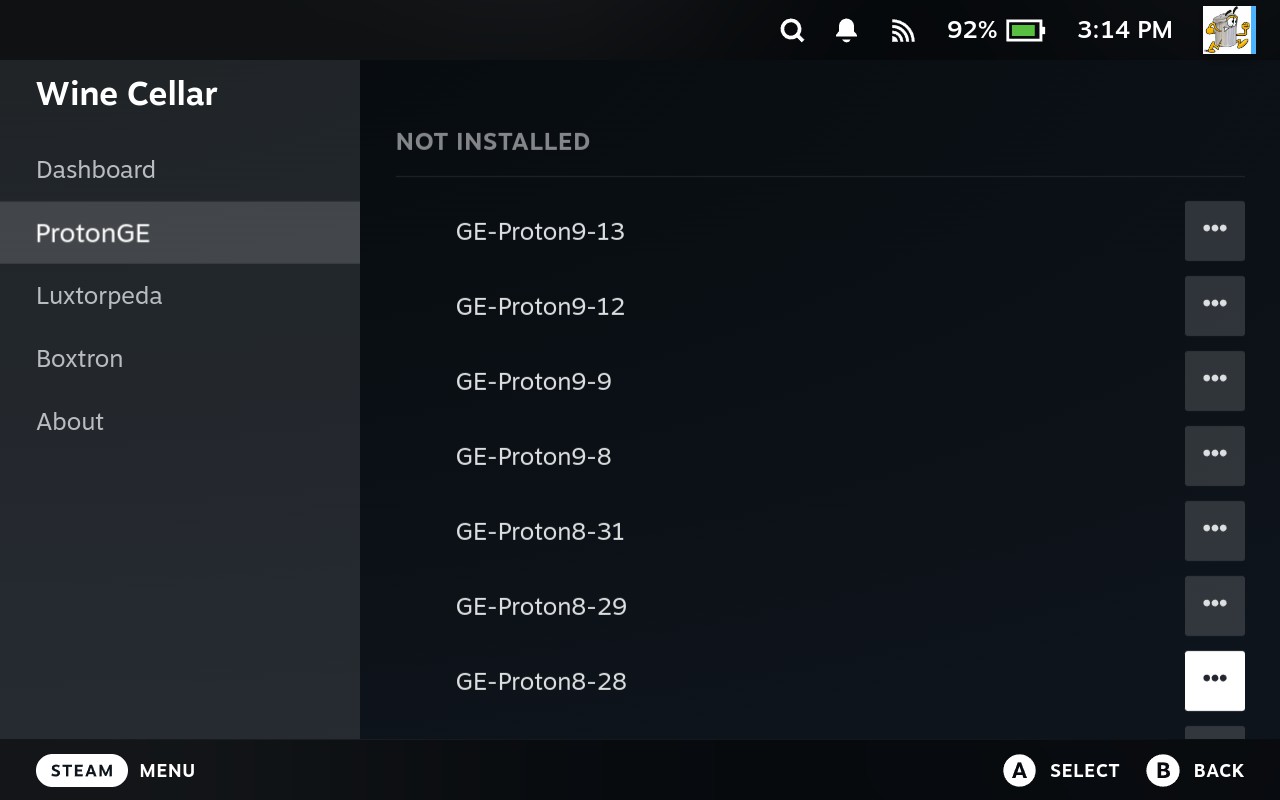
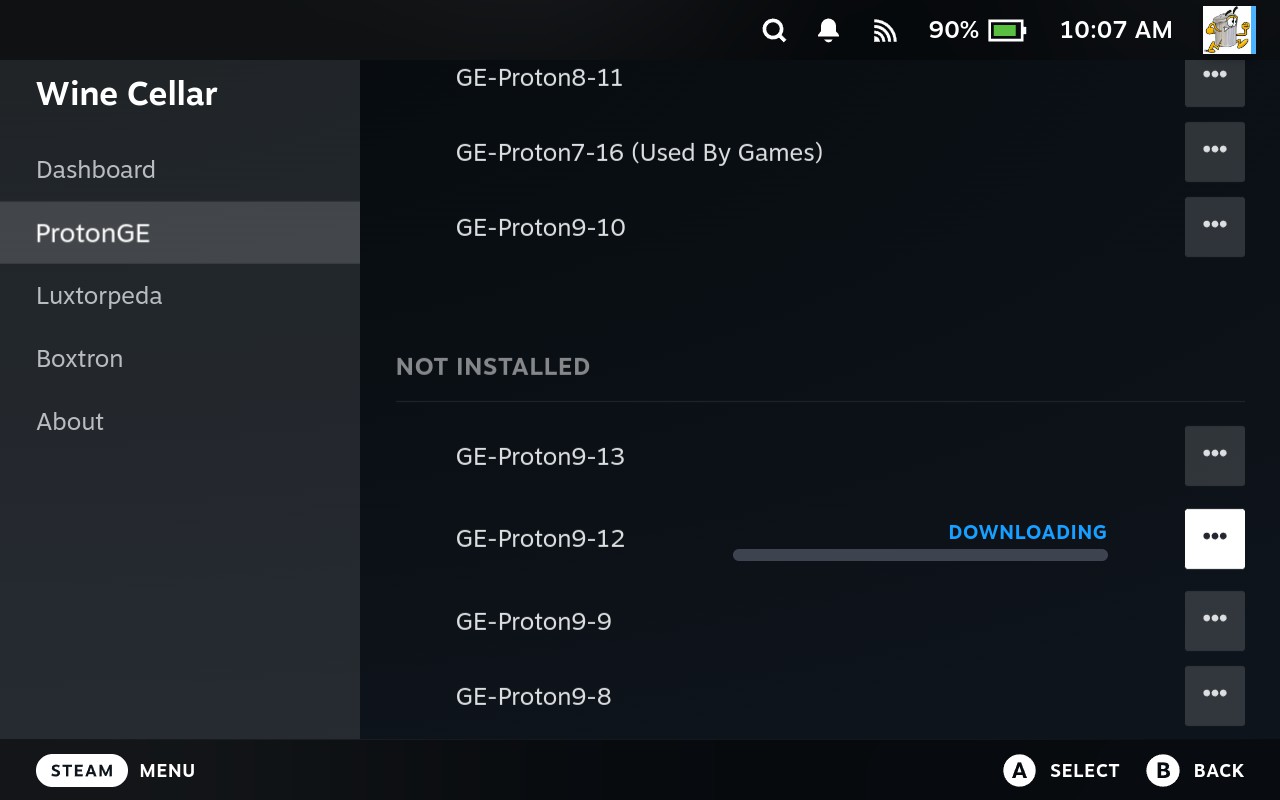
To install new versions of Proton you need to navigate down to the Proton version. In our case we navigate down to GEProton on our list, then across to the three dots. Push A to select.
Now you can select your new Proton version for use
Step 6
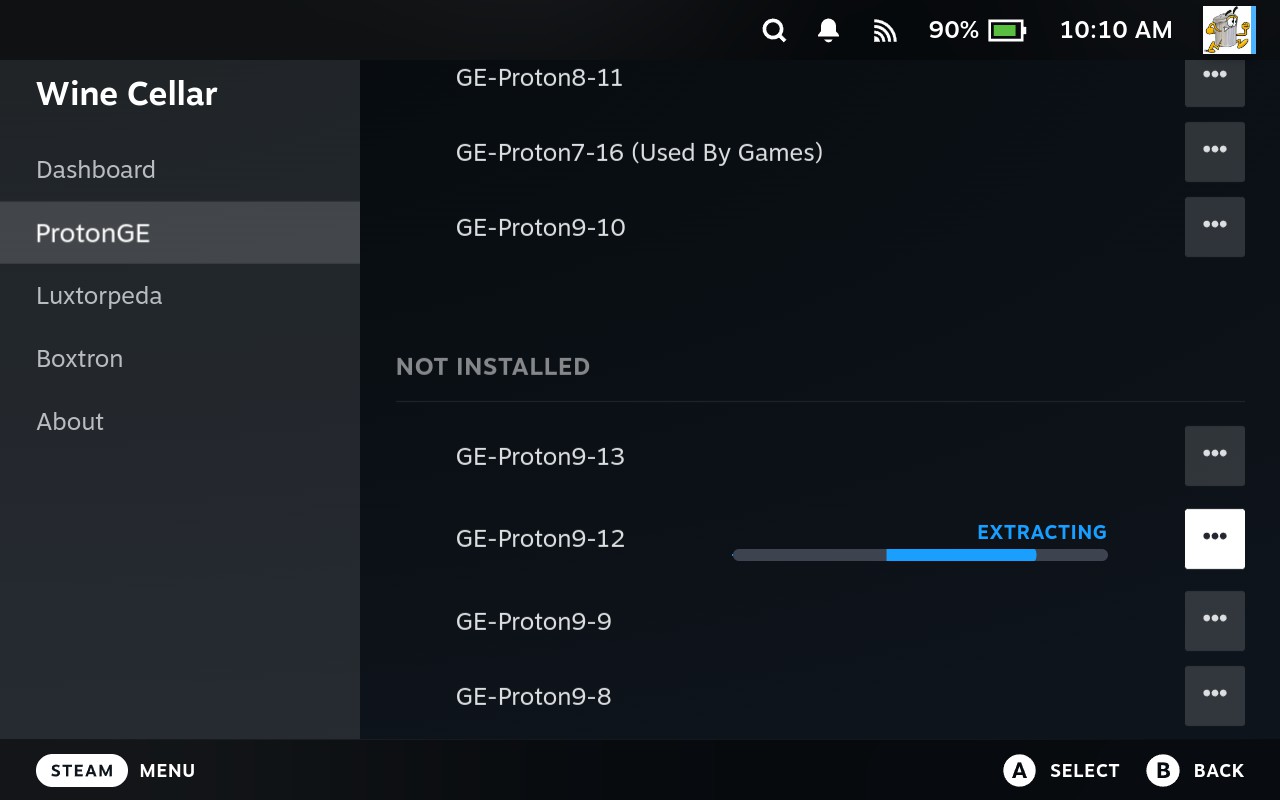
It will now proceed to install your selected version of Proton (in our example GEProton9-12). Once it has installed you will need to restart your Steam Deck to be able to apply it to your game.
Now that you’ve got your Proton version selected just back out to the game screen and push play.
How to Uninstall Old Proton Versions
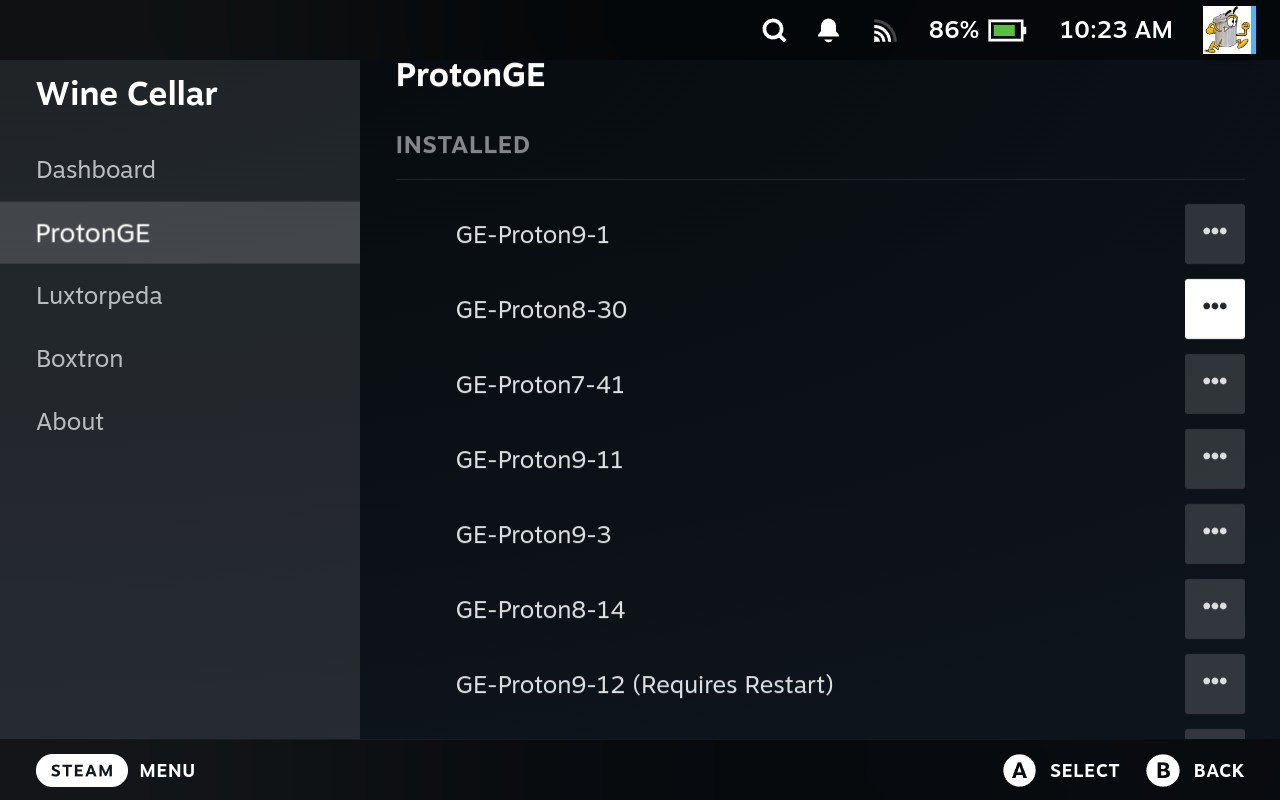
If you have Proton versions you no longer need you can easily uninstall them by the following step.
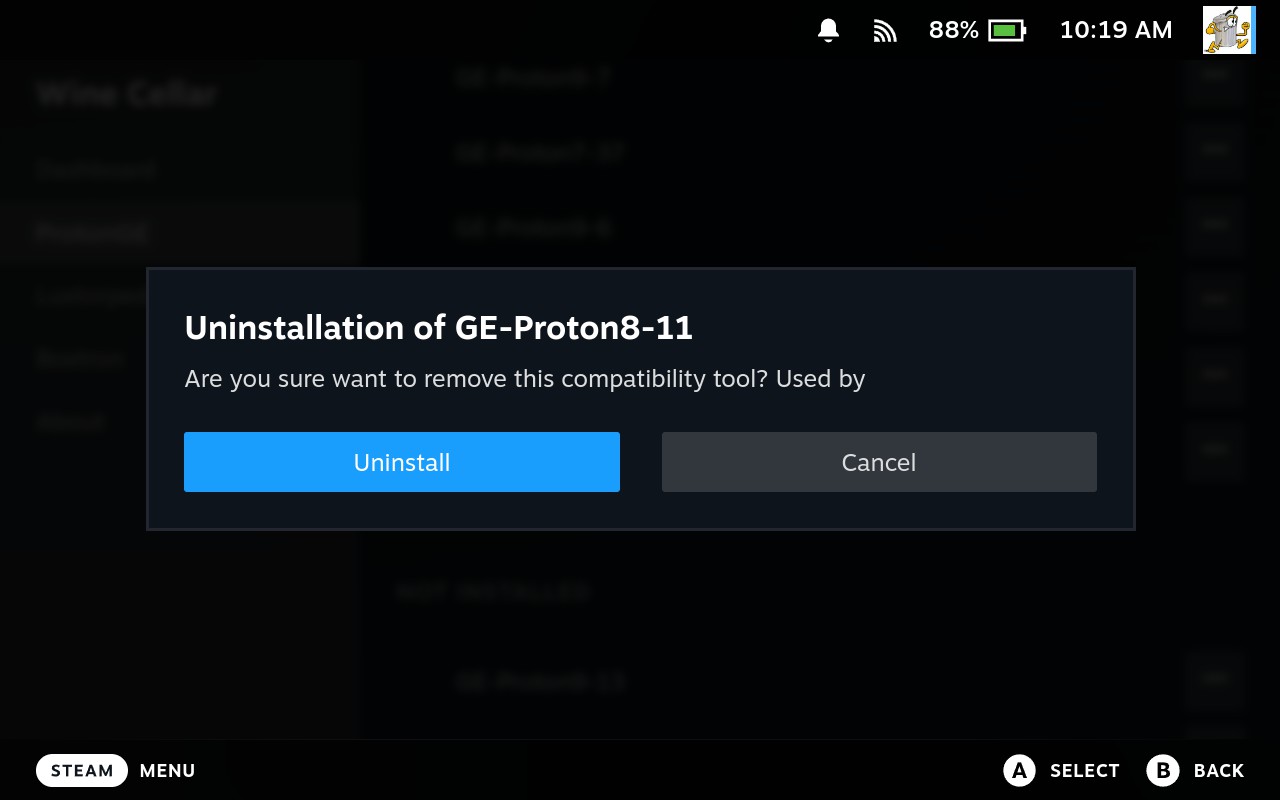
Navigate to the installed version your want to uninstall go to the three dots and push A to select. You will then be asked if you want to uninstall the Proton version. That’s it, it will then be removed from your Steam Deck.
Where to find more information or help:
If you have any other issues check out our Wiki FAQ, Troubleshooting and How To pages. If you can’t find what you are looking for there then jump in discord or on to reddit at r/JunkStore and have a look there.
